Home | Site Map | Contact Information
Offset Lithography
Offset lithography became the most popular printing process during the
20th century. It was a much faster and more practical way of printing
illustrations than previous methods. Willys service
information was printed using this method. Following
is a step by step explanation for the printing process used to create a
page from the
Willys-Overland MX-735
Vehicle Modification Kit manual. This example uses page 17 which
includes both text and an illustration.
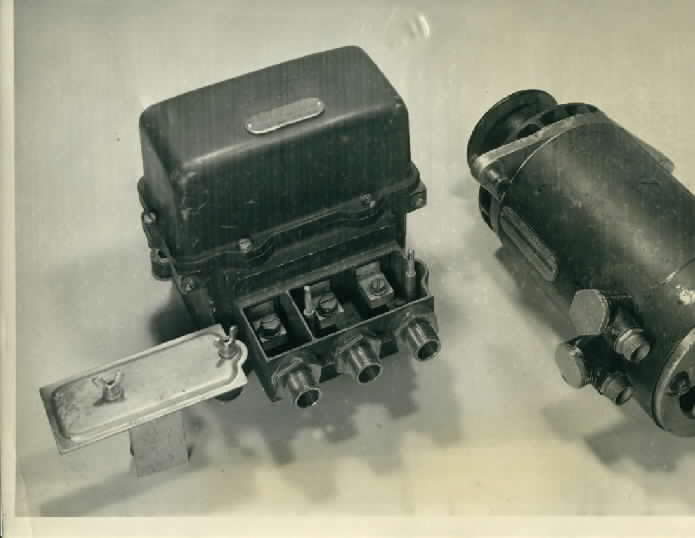 |
First a photo is
taken of the item to be used in the
illustration. A generator is also visible in the actual photo but it
will not appear in the final illustration. Notice how the regulator
wiring cover is
being supported, off to the side, by a block of wood. Click on the image for a larger view of the photograph. |
 |
This is the actual illustration
artwork; it is called a "board". The photograph of the voltage
regulator is
glued to thick cardboard. In this case the background is painted white
to
remove the shadows, the generator, and the block of wood that was
supporting the cover. Then the details are enhanced and highlighted by
painting. The artwork is larger than the final printed size so minute
details can easily be altered. Sometimes other photos are pasted on to
include parts or details not present in the original
photo. Inked text and arrows are also added. When the artwork is
complete it may not represent anything that actually ever existed.
Remember to keep this in mind when looking through Willys Service
Information. Click on the image for a larger view of the board. |
 |
Here is a side view of a
printing press. The
developed printing plate is tightly wrapped around the top cylinder.
The ink is
applied to the printing plate near the top. Ink will only transfer to
the ink-receptive coating since the water repels it from the
remainder of the plate. As the press turns the ink image is transferred
to the rubber blanket on the center cylinder. The ink on the rubber
blanket is a mirror image of the final document. Paper is fed in
between
the rubber blanket and the lower cylinder and the ink is again
transferred, this time to the paper. |
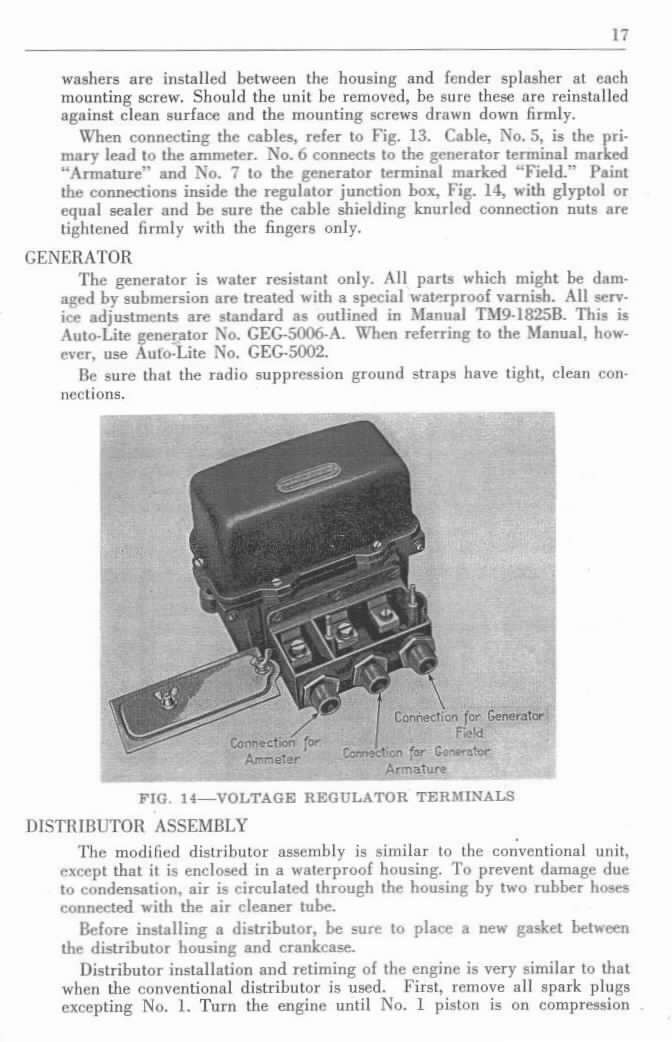 |
And here is the final product, a page in the service information. Click on the image for a larger view of page 17. |
The CJ-3A Story | CJ-3A
Photos | CJ-3A Specs and Tech Tips | CJ-3A Literature | Siblings of the CJ-3A | Accessories | Links
cj3a 11/06